Pool Landscaping
Pool Landscaping Guide: Layout, Drainage and Materials
Before selecting colour or surfacing, coordinate access, grades, equipment, furniture and the rules that shape the space around the pool.
Équipe Aménagement Lalonde · · 10 min read
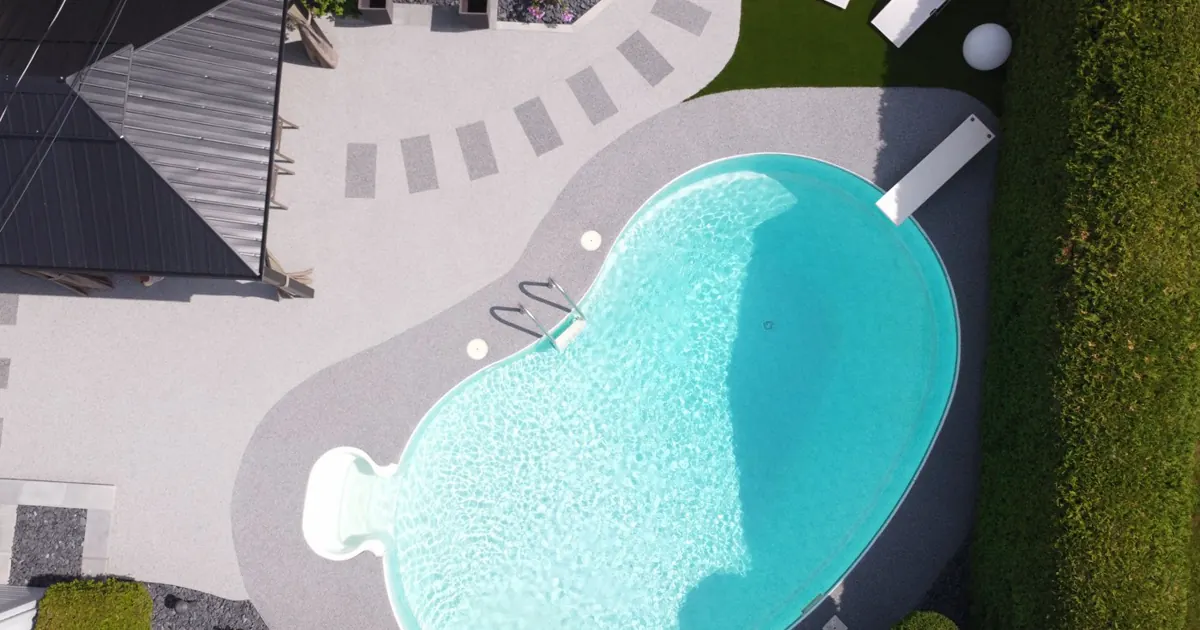
Pool landscaping starts with layout, circulation, drainage, controlled access and equipment before the finish material is chosen. The visible surface cannot correct a route that is too narrow, a misplaced gate, grades that direct water toward the pool or a moving base.
This guide focuses on planning the complete area around the pool. For composition, preparation and care of a rubber pool deck specifically, use our separate technical EPDM pool article.
Map activities before surfaces
Start by mapping travel between the house, yard, enclosure gate, steps, pool and seating areas. Add furniture, storage, mechanical equipment and enough space to move without being forced around temporary obstacles.
A quiet seating zone and a heavily travelled route to the water have different width and loading needs. The plan should also anticipate future accessories so an umbrella sleeve, shower or outdoor kitchen does not require cutting into a newly finished surface.
- Draw daily travel paths and maintenance access
- Place scaled furniture with clear circulation
- Reserve space for equipment and future accessories
- Reduce blind corners and unnecessary transitions
Integrate access rules at the design stage
Québec’s Residential Swimming Pool Safety Regulation addresses enclosures, gates and access for covered installations. Municipalities enforce the regulation and may have additional requirements or permit processes, so local review should happen before final elevations and edges are set.
A deck finish never replaces an enclosure, self-closing and self-latching gate or another required measure. Steps, platforms and terraces that lead to the water need to work with access controls rather than creating an unintended shortcut.
- Confirm permits and local rules with the municipality
- Place gates and enclosures before drawing finish areas
- Coordinate terraces, platforms, steps and equipment
- Keep access-control devices functional after construction
Plan grades and drainage
Water comes from rain, swimmers, cleaning and sometimes equipment. It should move to designed outlets instead of returning to the house, sitting in a low point or carrying contaminants into the pool. Grades need to be coordinated with drains, coping and thresholds.
Below-surface drainage matters too. A saturated or unstable base can move through freeze-thaw cycles and affect the finish. The design should distinguish surface runoff, foundation drainage and site-specific soil requirements.
- Survey elevations at the house, pool and surrounding yard
- Locate drains, downspouts and discharge points
- Avoid closed areas where water can remain trapped
- Keep drains and mechanical systems accessible for service
Compare materials by function
Concrete, pavers, stone, wood and poured rubber create different joints, details and maintenance routines. An EPDM rubber pool deck can provide a continuous finish with a resilient feel, but its suitability still depends on the substrate, full system, installation and use.
No material is slip-proof in every condition. Water, sunscreen, leaves, algae, snow and ice change surface conditions. Compare texture, drainage, cleaning, repair options and transitions instead of relying on one broad promise.
- Concrete and stone: rigid surfaces with coordinated finish and joints
- Pavers: modular units supported by a suitable base and joints
- Wood: structure, fasteners and exposure-specific care
- Poured rubber: a continuous system dependent on support and binder
Support circulation and accessibility
Clear circulation helps children, adults, visitors and people using mobility aids understand the route. Level changes, lips, steep grades, pinched paths and strong visual patterns can become barriers when they are not planned.
Accessibility Standards Canada’s draft CAN-ASC-2.1 provides planning guidance for outdoor routes, surfaces and water-activity facilities. It remains a draft whose application depends on the project and authority; a residence is not automatically compliant because a product is marketed as accessible.
- Provide a continuous route between key activities
- Allow manoeuvring and rest space
- Control slopes, lips and material transitions
- Consult users and specialists when accessibility is a project goal
Use the right construction sequence
Heavy work should come before the finish: excavation, utilities, drainage, base, pool equipment, coping, anchors, enclosures and structural elements. Installing the final surface too early increases the chance it will be cut or damaged to complete forgotten work.
Before installation, verify elevations, substrate condition, edge details and material readiness. At completion, record the products and maintenance method. Results remain dependent on support, drainage, system design, installation and care.
- 1. Rules, permits, layout and project budget
- 2. Excavation, utilities, drainage and foundation
- 3. Pool, coping, structures, enclosures and anchors
- 4. Grade verification and substrate preparation
- 5. Surfacing, cure or return to service, then maintenance
Frequently asked questions
Which material is best for a pool surround?
The choice depends on support, grades, use, cleaning, transitions, appearance and applicable project rules. Concrete, pavers, stone, wood and rubber each create different details and constraints.
Does a rubber pool deck replace safety measures?
No. Surfacing never replaces an enclosure, gate, supervision or another applicable requirement. Access control and layout should be confirmed with the municipality and responsible professionals.
When should the final pool-deck surface be installed?
After work that could cut or heavily load it, including excavation, drainage, utilities, base construction, equipment, coping, anchors and enclosures. Grades and the substrate should be approved first.
How can ponding around the pool be reduced?
Coordinate elevations, grades, drains, outlets and base drainage. A finish alone does not automatically correct a closed low point or saturated foundation; those causes need to be addressed in the design.